Monday, October 27, 2014

Ignoring Files Specific to Oracle JDeveloper & ADF

If you are using Oracle JDeveloper and ADF with some version control system, such as Git, here’s a minimum list of JDeveloper and ADF specific untracked files and directories you will want to add to your .gitignore file to ignore them:

.data/
temp/
classes/
cwallet.sso.lck

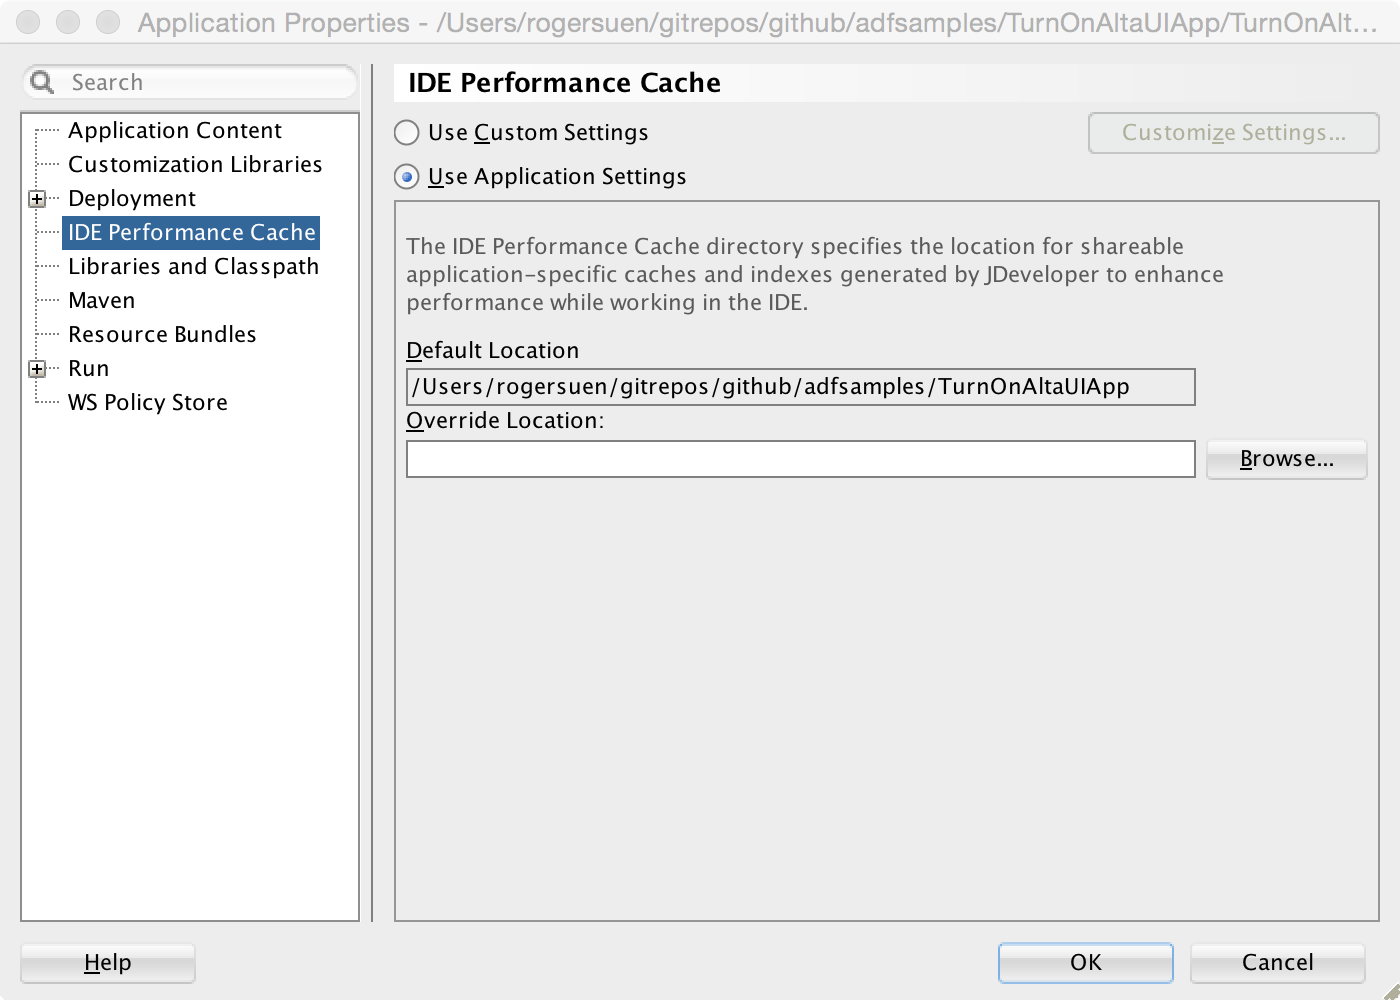
The .data/ directory is the application storage directory used by the IDE Performance Cache feature. For each application, you can specify a directory where application-specific caches and indexes used by JDeveloper are stored. To customize the location of the directory, open the Application Properties dialog, then go to the IDE Performance Cache page.

Image: IDE Performance Cache

The default location is the root directory of the application:

Image: IDE Performance Cache

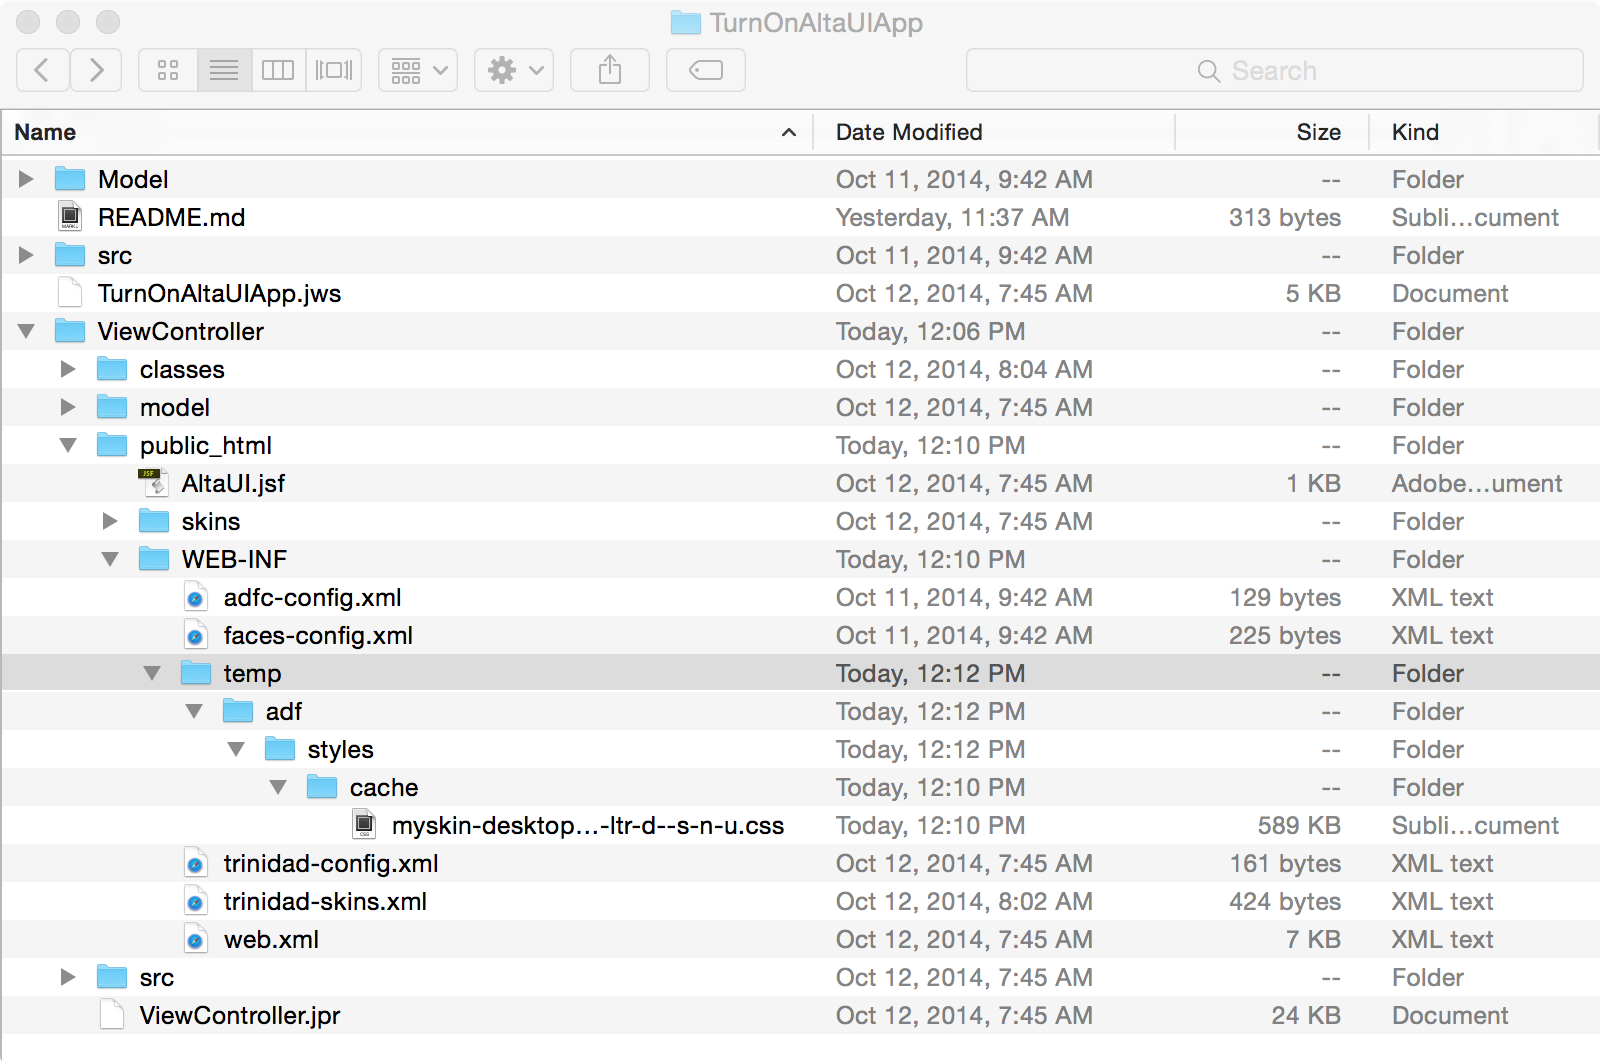
The temp/ directory is used for ADF styles caching. It gets created under the WEB-INF/ directory in the web content directory of the view project, when you open a page or page fragment in the design mode in JDeveloper.

Image: ADF Styles caching

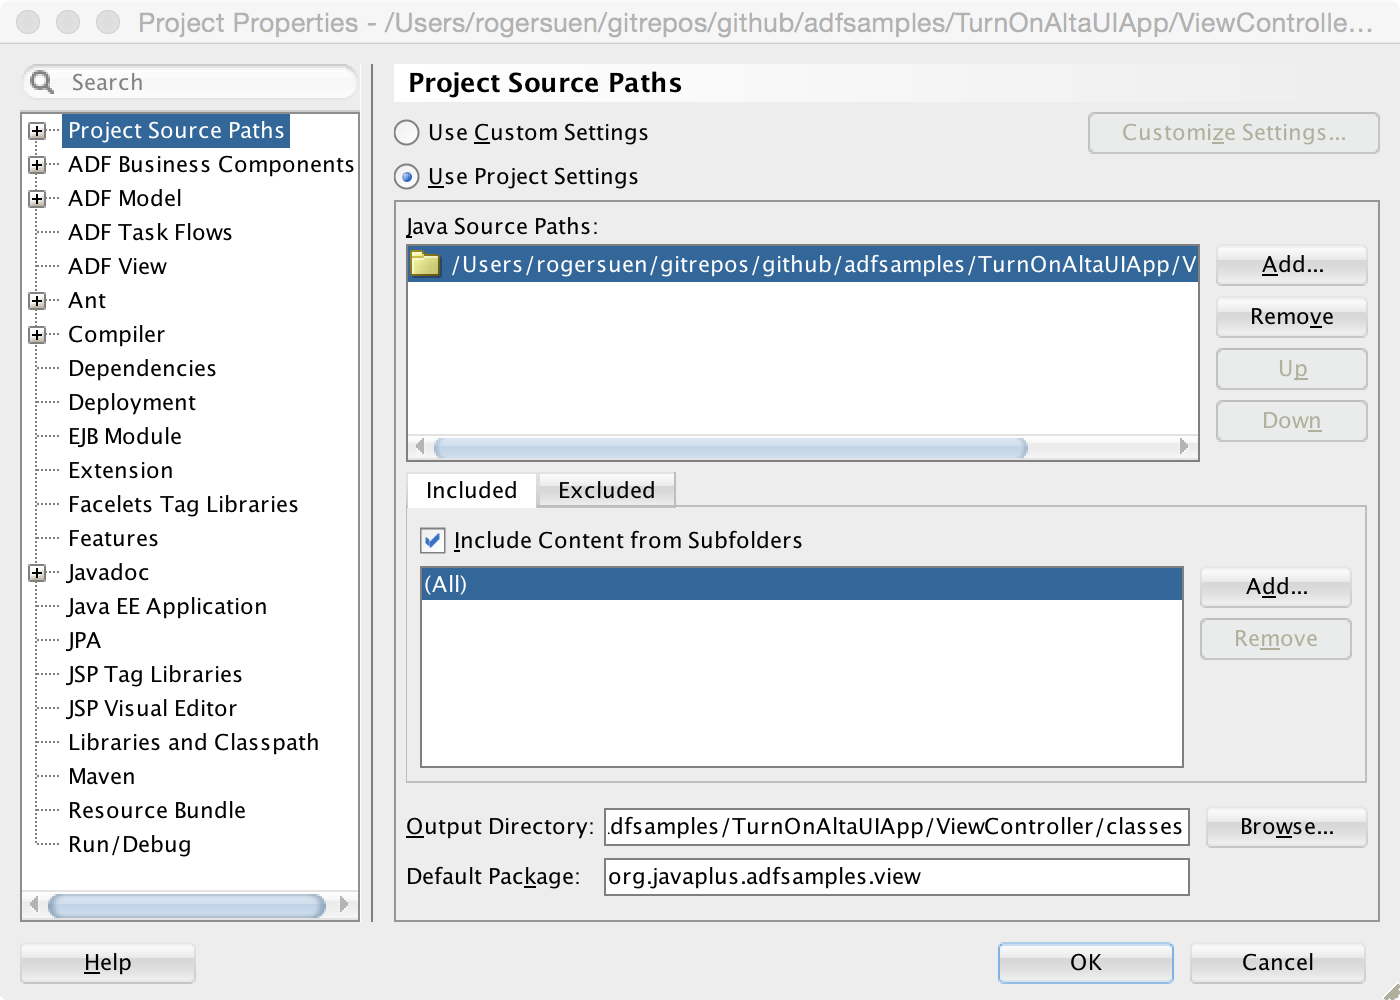
The classes/ directory is the default Output Directory for the project. It can be customized in the Project Properties dialog, Project Source Paths page.

Image: Project Source Paths

The cwallet.sso.lck file is the lock file for the wallet.sso file which is a part of Oracle Credential Store Framework.

The ignore file list is also useful when you are using Subversion or CVS.

Chinese Summary:

针对 Oracle 的 JDeveloper 和 ADF 的,用于版本控制系统的忽略文件列表。可以添加到诸如 Git 的 .gitignore 文件,或者类似的其它版本控制系统(Subversion 和 CVS)的忽略文件中。

Sunday, October 26, 2014

ADF - Displaying Multi-Line Text with outputText Component

With ADF, the inputText component can be used to generate a multi-row text area control in browser, allowing the user to enter multi-line text. To display the multi-line text that the user input, a common practice is using a read-only multi-row inputText component. I bet this approach isn't always what you want, as the inputText component has fixed rows, and shows a scrollbar when necessary. In this post, I'm describing how to display multi-line text with the outputText component. It's about CSS line-wrapping and word-breaking pertaining to ADF faces components.

To display multi-line text, the basic idea is applying the white-space CSS property to the element with one of following values: pre, pre-wrap and pre-line. This property controls the processing of whitespace inside an element. The exact value you need depends on the behavior you want. In this post, I'm using pre-wrap as the example, which means "Sequences of whitespace are preserved. Lines are broken at newline characters, at <br>, and as necessary to fill line boxes.". Here's the code snippet from the skin of the sample application:

.PreWrap {
    white-space: -moz-pre-wrap; /* Mozilla */
    white-space: pre;           /* CSS 2.0 */
    white-space: pre-wrap;      /* CSS 2.1 */
    word-wrap: break-word;      /* IE 5.5-7 */
}

In this rule, the word-wrap CSS property specifies whether the break within a word is allowed to prevent overflow when an otherwise-unbreakable string is too long to fit within line box. The property is applies only when the white-space property allows wrapping. The value of break-word means "Normally unbreakable words may be broken at arbitrary points if there are no otherwise acceptable break points in the line." This property is useful for the cases, such as really long URLs.

For example, the normal word-breaking runs like the following:


As you can see, it tries the best to wrap the text to fit within the line box by breaking the text after the hyphens which are acceptable break points. But it still overflows.

With break-word, it runs like this:


Now, it breaks the text at arbitrary points in addition to those acceptable break points.

The white-space and word-wrap properties are supposed to be what exactly you need to display multi-line text with the outputText ADF Faces component, but it's not the whole story. You have to deal with the layout component to make sure the outputText component inside it works as you expect. Here, I'm talking about the panelFormLayout and then panelGridLayout components - the most common layout components that the multi-line outputText components will work with.

To work with the panelFormLayout component, wrap the outputText component with the PreWrap style class in a panelLabelAndMessage component, and put it into the panelFormLayout component:

<af:panelFormLayout id="pfl1" labelWidth="100" fieldWidth="350">
    <af:inputText id="it1" label="inputText"
                  placeholder="Add some multi-line text and click Update to display it below."
                  contentStyle="width:340px;" rows="12" value="#{pageFlowScope.text}"/>
    <af:button text="Update" id="b_updt"/>
    <af:panelLabelAndMessage id="plam1" label="outputText" labelStyle="vertical-align:top">
        <af:outputText id="ot1" value="#{pageFlowScope.text}" partialTriggers="b_updt"
                       styleClass="PreWrap"/>
    </af:panelLabelAndMessage>
</af:panelFormLayout>

If there is a long unbreakable string in the text, it works like this (See panelFormLayout page in the sample application):


Even with the fieldWidth="350" property, the content cells (with yellow background) of the panelFormLayout still expand to fit the longest unbreakable string.

The panelFormLayout component generates table elements to layout the components inside it. By default, the table element uses the automatic table layout algorithm. In case the content does not fit in the column,  the column's width is set by the preferred minimum width, e.g. by trying all acceptable line breaks.

This is how it works - by default. Fortunately, we can change this behavior by changing the table-layout CSS property of the table from auto to fixed. For example:

.FixedTableLayout af|panelFormLayout::column > table {
    table-layout: fixed;
    width: 100%;
}

This ADF skin rule makes sure that tables generated by the panelFormLayout component for columns use the fixed layout algorithm: "Table and column widths are set by the widths of table and col elements or by the width of the first row of cells. Cells in subsequent rows do not affect column widths".  Apply the rule to the example (panelFormLayout-fixedTableLayout.jsf):

<af:panelFormLayout id="pfl1" labelWidth="100" fieldWidth="350" styleClass="FixedTableLayout">
    <af:inputText id="it1" label="inputText"
                  placeholder="Add some multi-line text and click Update to display it below."
                  contentStyle="width:340px;" rows="12" value="#{pageFlowScope.text}"/>
    <af:button text="Update" id="b_updt"/>
    <af:panelLabelAndMessage id="plam1" label="outputText" labelStyle="vertical-align:top">
        <af:outputText id="ot1" value="#{pageFlowScope.text}" partialTriggers="b_updt"
                       styleClass="PreWrap"/>
    </af:panelLabelAndMessage>
</af:panelFormLayout>


Or, keeping the table-layout: auto property, to achieve the same purpose, we can wrap the outputText component inside a fixed-width containing box (panelFormLayout-fixedWidthContainer.jsf):

<af:panelFormLayout id="pfl1" labelWidth="100" fieldWidth="350">
    <af:inputText id="it1" label="inputText"
                  placeholder="Add some multi-line text and click Update to display it below."
                  contentStyle="width:340px;" rows="12" value="#{pageFlowScope.text}"/>
    <af:button text="Update" id="b_updt"/>
    <af:panelLabelAndMessage id="plam1" label="outputText" labelStyle="vertical-align:top">
        <af:panelGroupLayout id="pgl1" layout="vertical" styleClass="FixedWidthContainer">
            <af:outputText id="ot1" value="#{pageFlowScope.text}" partialTriggers="b_updt"
                           styleClass="PreWrap"/>
        </af:panelGroupLayout>
    </af:panelLabelAndMessage>
</af:panelFormLayout>

Here's the CSS rule:

.FixedWidthContainer {
    display: block;
    width: 340px;
    background-color: #fbf; /* for visual hint only */
}


We are good with the panelFormLayout component now. Let's try out the panelGridLayout Component. If we put the multi-line outputText component directly inside a gridCell component as in the following code snippet (panelGridLayout.jsf):

<af:gridCell id="gc4" marginStart="10px" marginEnd="10px" width="340px"
             inlineStyle="background-color:#ffb;">
    <af:outputText id="ot1" value="#{pageFlowScope.text}" partialTriggers="b_updt"
                   styleClass="PreWrap"/>
</af:gridCell>

It works like this:


Pretty much the same problem as that in the panelFormLayout component. That's because for the geometry management purpose, the gridCell component generates an absolutely positioned div element inside the div element generated by the panelGridLayout component. For an absolutely positioned block, it width is determined by so-called shrink-to-fit width - similar to calculating the width of a table cell using the automatic table layout algorithm.

We don't have a layout property this time, but we can still work around this by wrapping the outputText component inside a fixed-width containing block (panelGridLayout-fixedWidthContainer.jsf):

<af:gridCell id="gc4" marginStart="10px" marginEnd="10px" styleClass="af_gridCell">
    <af:panelGroupLayout id="pgl3" layout="vertical" styleClass="FixedWidthContainer">
        <af:outputText id="ot1" value="#{pageFlowScope.text}" partialTriggers="b_updt"
                       styleClass="PreWrap"/>
    </af:panelGroupLayout>
</af:gridCell>

Now, it works like this:


In summary, we can make use of the white-space and word-wrap CSS properties to display multi-line text with the outputText component. To get the expected width of the outputText component in a panelFormLayout or panelGridLayout component, we can wrap the outputText component in a fixed-width containing box. For the panelFormLayout component particularly, we can also apply table-layout: fixed to the content cells of the panelFormLayout component in the skin file to enforce the field width.

Chinese Summary:

利用 white-spaceword-wrap CSS 属性,我们可以用 ADF 的 outputText 组件显示自动折行的多行文本。将 outputText 组件配合 panelFormLayoutpanelGridLayout 布局组件使用时,为了保证 outputText 输出指定宽度的多行文本,可以将 outputText 组件包裹在一个定宽的 panelGroupLayout 组件中,然后再置于 panelFormLayout 或者 panelGridLayout 组件中。对于 panelFormLayout 组件,也可以在 ADF 皮肤文件中为 panelFormLayout 组件的 column 伪元素中对应的 table 元素设置 table-layout: fixed 属性,以关闭默认的表格自动布局算法,保证表格按照指定的宽度布局。

Resources:
Sample Application:

Environment:

  • Mac OS X Version 10.10
  • Safari Version 8.0
  • JDeveloper 12.1.3.0.0 Build JDEVADF_12.1.3.0.0_GENERIC_140521.1008.S
  • Oracle Alta UI

Monday, October 13, 2014

Alta UI and Bootstrap - box-sizing for af:panelTabbed

Oracle just announced its all new modern UI system - Alta UI. It's believed that more and more organizations and applications will turn to the Alta UI system. Bootstrap is the most popular HTML, CSS, and JS framework for developing responsive, mobile first projects on the web. In this series of posts on Alta UI and Bootstrap, I will describe some issues when integrating Bootstrap into your ADF fusion web applications that are using the Alta UI skin and how to work around these issues.

This first post is about <af:panelTabbed> component. The following screen shot illustrates a simple panelTabbed component using the Alta UI skin.


After applying Bootstrap framework to the page. It looks like this:


The Bootstrap skin in the sample application is a custom skin extended from the Oracle Alta UI skin, and containing various rules used to fix integration issues. After picking up the Bootstrap skin at runtime in the sample application, it looks good again:


The tab glitch is caused because in the following code snippet from the alta-v1-desktop.css file, Alta UI assumes the box model defined by the box-sizing property is content-box, and happily defines the fixed value for the height property.

af|panelTabbed::tab-content,
af|navigationPane-tabs::tab-content {
  /* Fix the height of the tab content to match the height of the icon if present in the tab content */
  height: 16px;
  padding-left: 8px;
  padding-right: 4px;
  padding-top: 7px;
  padding-bottom: 7px;
  border-right: 1px solid transparent;
  border-left: 1px solid transparent;
  /* Undo background color from simple skin */
  -tr-inhibit: background-color;
  -tr-inhibit: box-sizing;
}

Yes, the initial value for the box-sizing property is content-box. It works well without Bootstrap integrated with it. After Bootstrap 3 is released, everything in Bootstrap gets box-sizing: border-box, making for easier sizing options and an enhanced grid system. With border box model, the width and height properties include the padding and border, thus, the resulting tabs in the sample page are shorter than we expect. 

To fix this glitch, we can enforce the content box model for the selectors listed above. The following code snippet from the skin file bootstrap-v1-desktop.css in the sample application shows how to do that.

/** Bootstrap uses box-sizing: border-box, therefore reset it back to the initial value content-box here, 
    because Alta specifies tab height using content box model */
af|panelTabbed::tab-content,
af|navigationPane-tabs::tab-content {
  box-sizing: content-box;
}

You can find more information and download the sample application by following the links below.

Resources:

Sample Application:
Environment:
  • Mac OS X Version 10.9.5
  • Safari Version 7.1
  • JDeveloper 12.1.3.0.0 Build JDEVADF_12.1.3.0.0_GENERIC_140521.1008.S
  • Bootstrap v3.2.0 

Note: The Bootstrap framework used in the sample application is a customized version with @font-size-base set to 12px which is the default font size defined in the skin file alta-v1-desktop.css of Alta UI as follow:

.AFDefaultFontSize:alias {
  font-size: 12px;
}

Chinese Summary:

关于集成  Bootstrap 框架和新的 Oracle Alta UI 的系列博客中第一篇:如何解决 ADF panelTabbed 组件中 box-sizing CSS 属性造成的问题。

Sunday, October 12, 2014

ADF - Turn on and Extend the New Alta UI Skin

The Oracle Alta UI is an all new UI system introduced from ADF 12.1.3. It's a big step for Oracle to embrace the modern UI design for mobile and browser applications. You can find more information by following links in the resources section below.


The Oracle Alta UI is meant for new development and is an opt-in.  By default, the Skyros skin is still applied to the new fusion web application.


To use the Alta UI skin, simply change the <skin-family> value from skyros to alta in the trinidad-config.xml file of your fusion web application:

<?xml version="1.0" encoding="UTF-8"?>
<trinidad-config xmlns="http://myfaces.apache.org/trinidad/config">
  <skin-family>alta</skin-family>
  <skin-version>v1</skin-version>
</trinidad-config>

You probably want to customize the Alta UI skin for your application. To create a customized ADF skin in JDeveloper, you can  right-click your view controller project in the Applications window, choose New, select From Gallery... to bring out the New Gallery dialog. In the Web Tier category, select JSF/Facelets and then ADF Skin:


In the Skin File page of the Create ADF Skin dialog, fill up the information for your new skin.


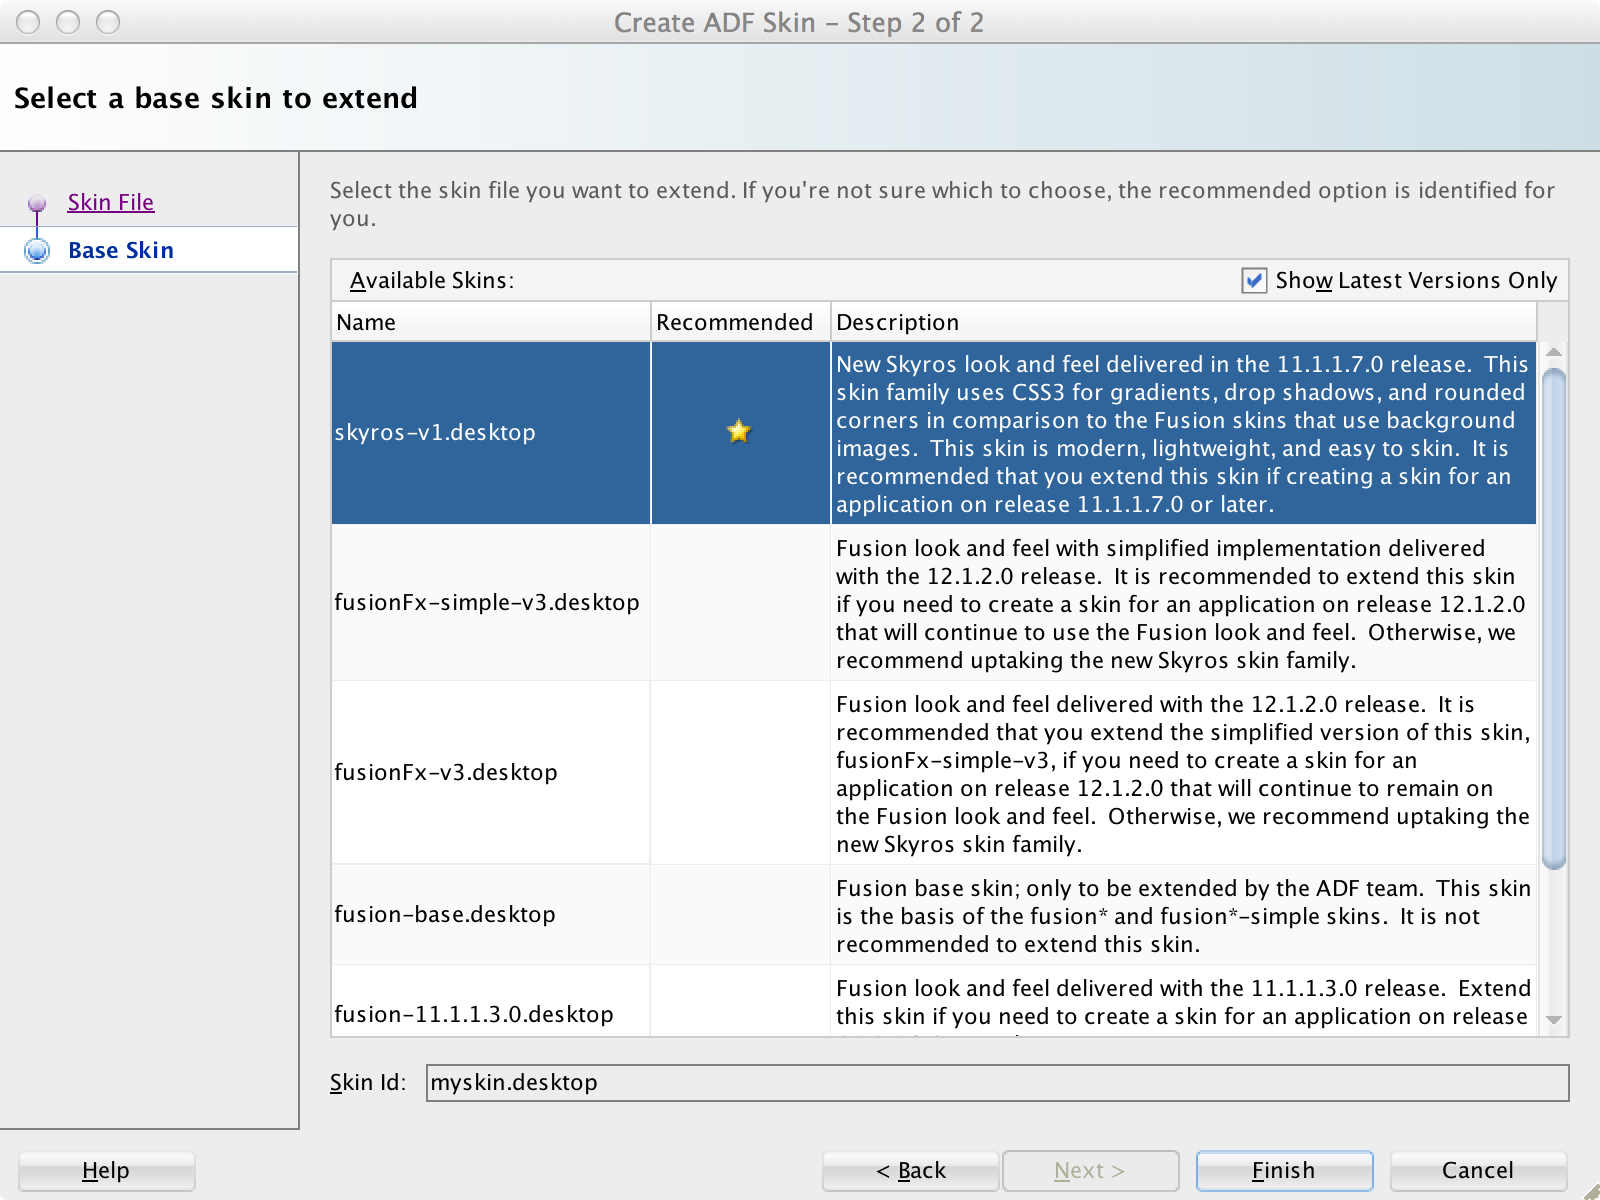
In the Base Skin page, you need choose one of the ADF skins that Oracle ADF provides. In the current version of Developer 12.3.1, the Alta UI skin is not available in the list yet. Simply accept the recommended one (skyros-v1.desktop). JDeveloper will help us to create and modify the associated configuration files, then we will fix it.


In the trinidad-skins.xml file, you can find the metadata for the skin that you create. It shows that your skin extends from the ADF skin of Skyros family.


To make your skin to extend from the Alta UI skin instead, manually change the <extends> value from the skyros-v1.desktop to alta-v1.desktop as illustrated below:

<?xml version="1.0" encoding="UTF-8"?>
<skins xmlns="http://myfaces.apache.org/trinidad/skin">
  <skin>
    <id>myskin.desktop</id>
    <family>myskin</family>
    <extends>alta-v1.desktop</extends>
    <render-kit-id>org.apache.myfaces.trinidad.desktop</render-kit-id>
    <style-sheet-name>skins/myskin/myskin.css</style-sheet-name>
    <bundle-name>org.javaplus.adfsamples.view.skinBundle</bundle-name>
  </skin>
</skins>

Now, you have your customized skin extended from the Alta UI skin.

Chinese Summary:

如何启用在 ADF 12.1.3 中发布的新的 Oracle Alta UI 皮肤,以及如何基于 Alta UI 皮肤扩展自己的皮肤。

Environment:
  • JDeveloper Version 12.1.3.0.0 (Build JDEVADF_12.1.3.0.0_GENERIC_140521.1008.S)
  • Mac OS X Version 10.9.5
Resources:
Sample Application:

Thursday, October 9, 2014

ADF - Line up components in panelFormLayout

The panelFormLayout component can be used to position input components such that their labels and fields line up vertically. Other components can also be placed in the panelFormLayout, but they will not line up perfectly.


As you can see from the above example, the first three rows line up perfectly, but the last two rows line up slightly to the right.

After take a closer look to the rendered page, it turns out ADF generates different style classes for the rows with input components and those with other components. For input components (and panelLabelAndMessage), ADF generates the style class AFPanelFormLayoutContentCell for the table cells containing the input controls, but the style class af_panelFormLayout_content-cell for other components (button, panelGroupLayout, etc.).


The af_panelFormLayout_content-cell (starts with "af_") is the generated style class name of the ADF skin component-specific selector af|panelFormLayout::content-cell (starts with "af|", with a pseudo-element). For some reason (flexible padding perhaps), AFPanelFormLayoutContentCell is used for input components and panelLabelAndMessage instead, with basically the same name but following the convention that is usually used in the naming of global selector aliases and miscellaneous style classes.

Anyway, if needed, we can override the padding-left property of af|panelFormLayout::content-cell to line up components in a way we like. For example:

af|panelFormLayout::content-cell {
    padding-left: 4px; /* down from 8px */
}

Note that, the content-cell pseudo-element of the af|panelFormLayout selector will not show up in the selector window of your ADF skin editor:


You need add it manually.

Environment:
  • Mac OS X 10.9.5
  • Google Chrome 37.0.2062.124
  • JDeveloper 12.1.3.0.0
Resources:
Sample application: